

Excel macros are sets of instructions that can be used to automate tasks in Excel, which is part of the Microsoft Office suite of programs. Macros can be used to easily perform repetitive tasks that would take a long time for someone to do manually, or to quickly and easily automate complex processes that require a number of different steps to achieve.
Simple Example
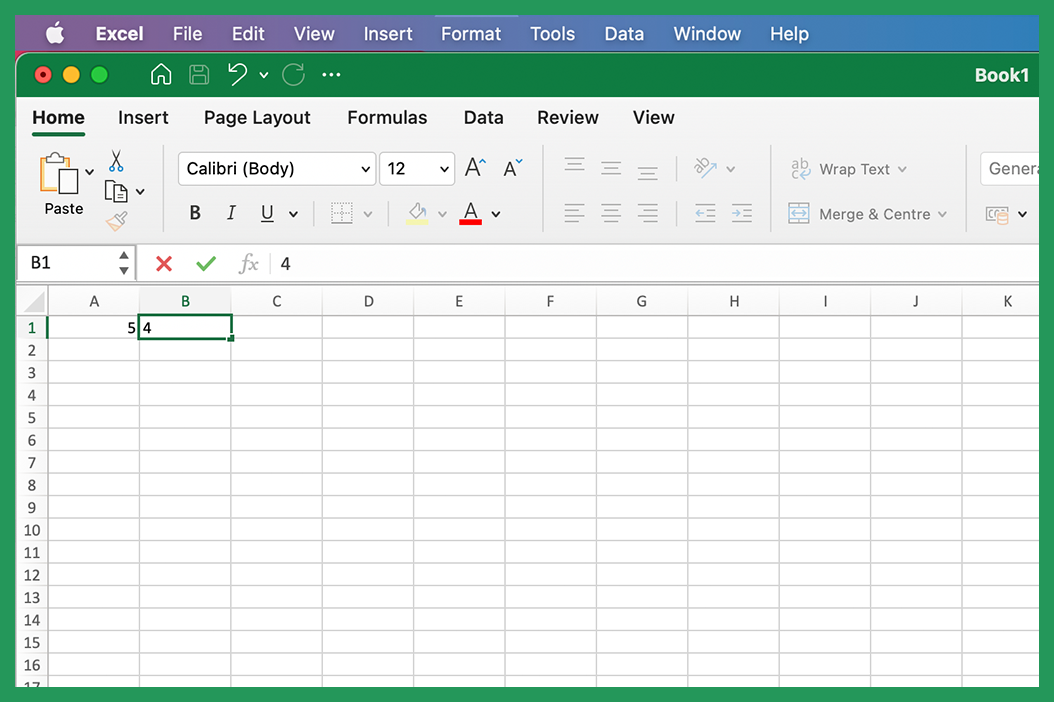
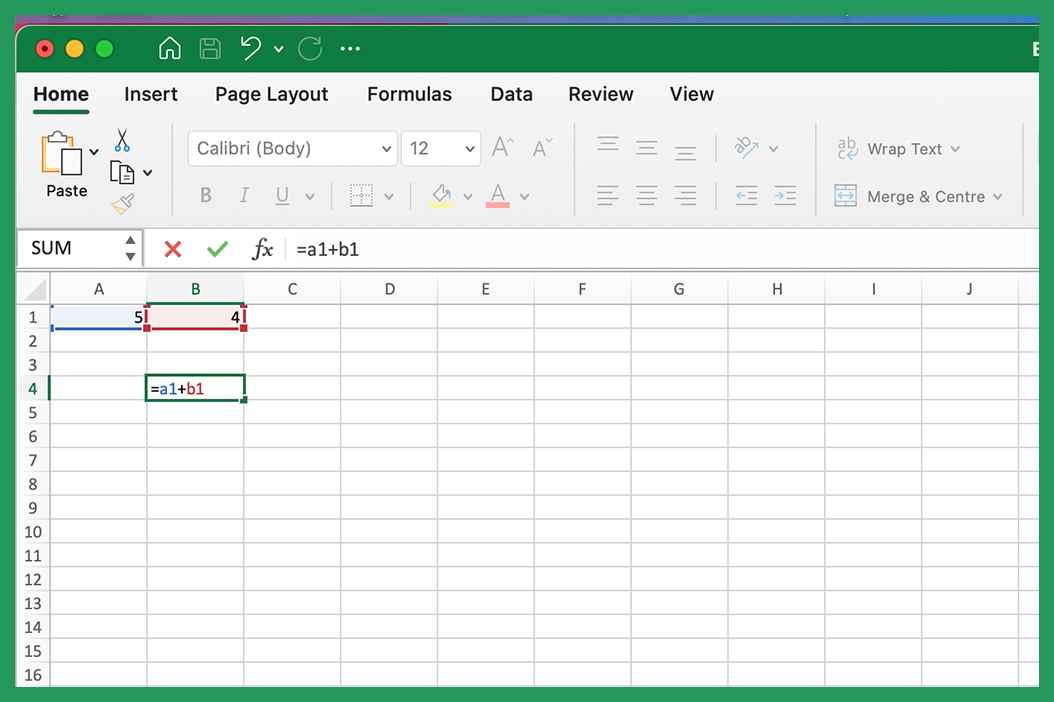
Say we wanted to create a macro that adds together cells A1 and B1 we can create a macro to do that (but we wouldn't normally use macros for something like this).
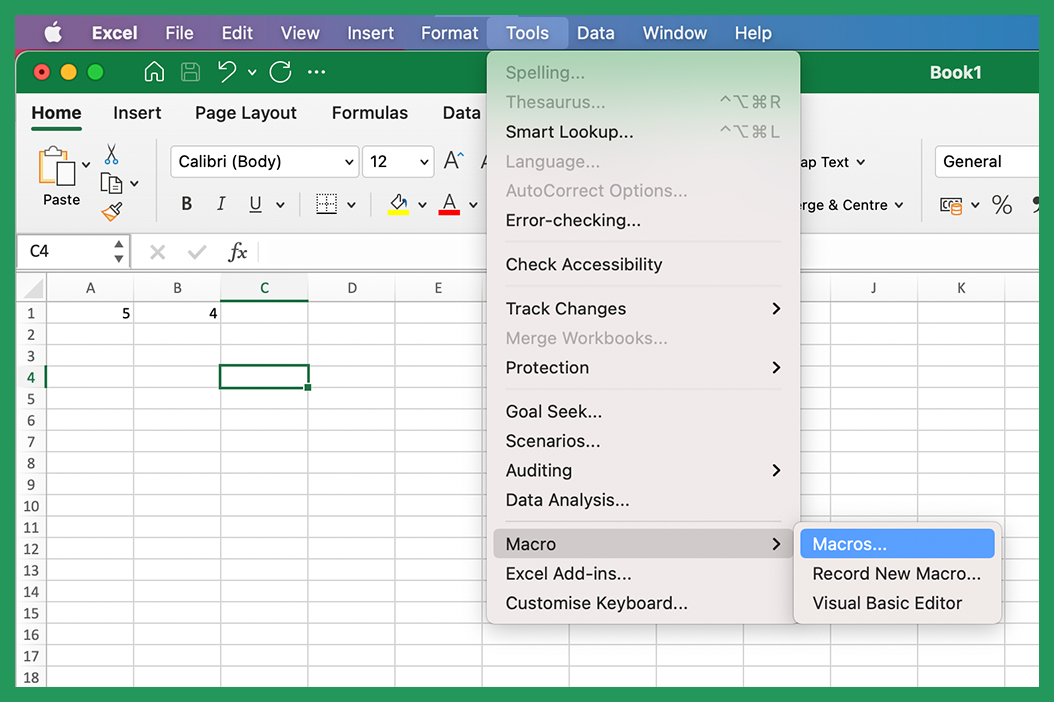
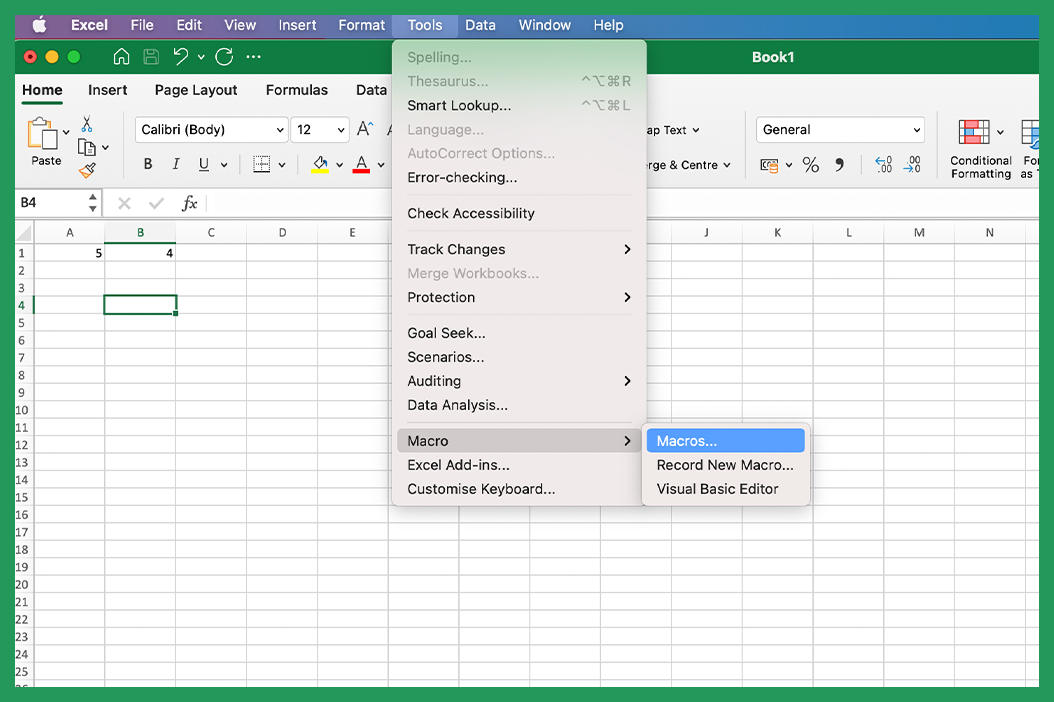
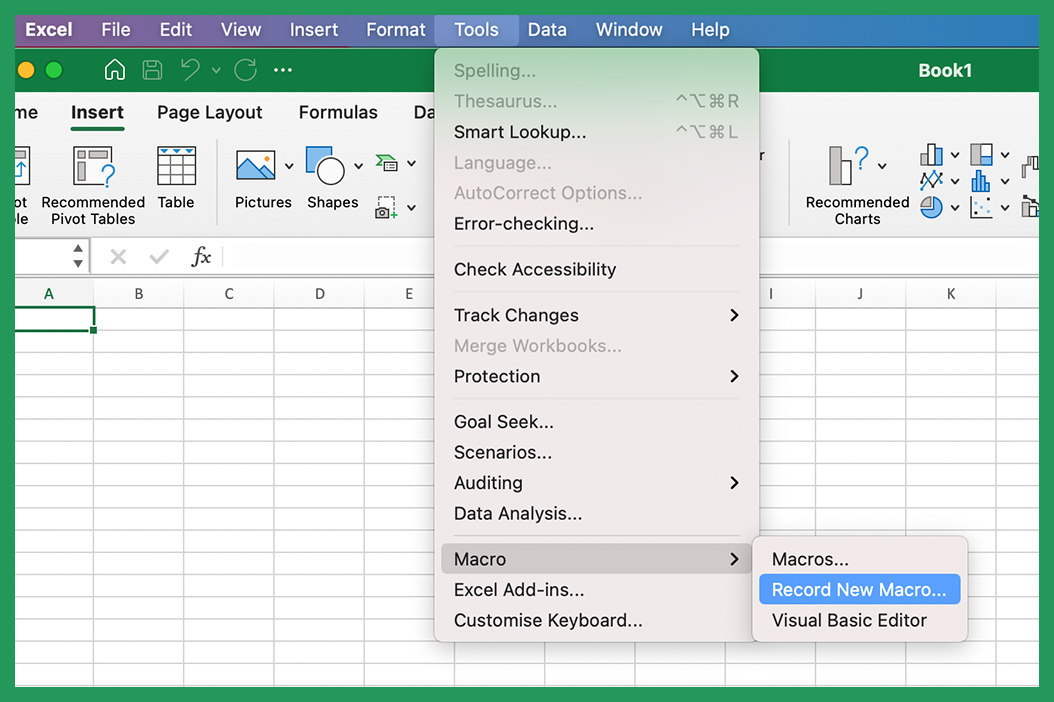
We then go to Tools > Macro > Record New Macro.
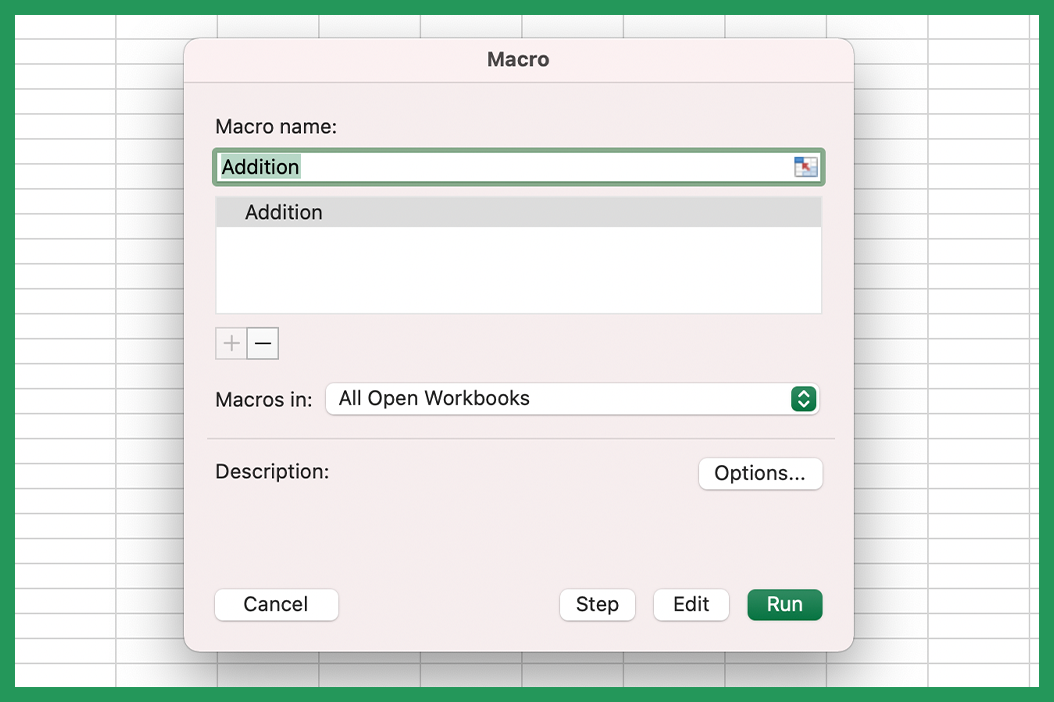
Give your new macro a name, we will call this example one "Addition".
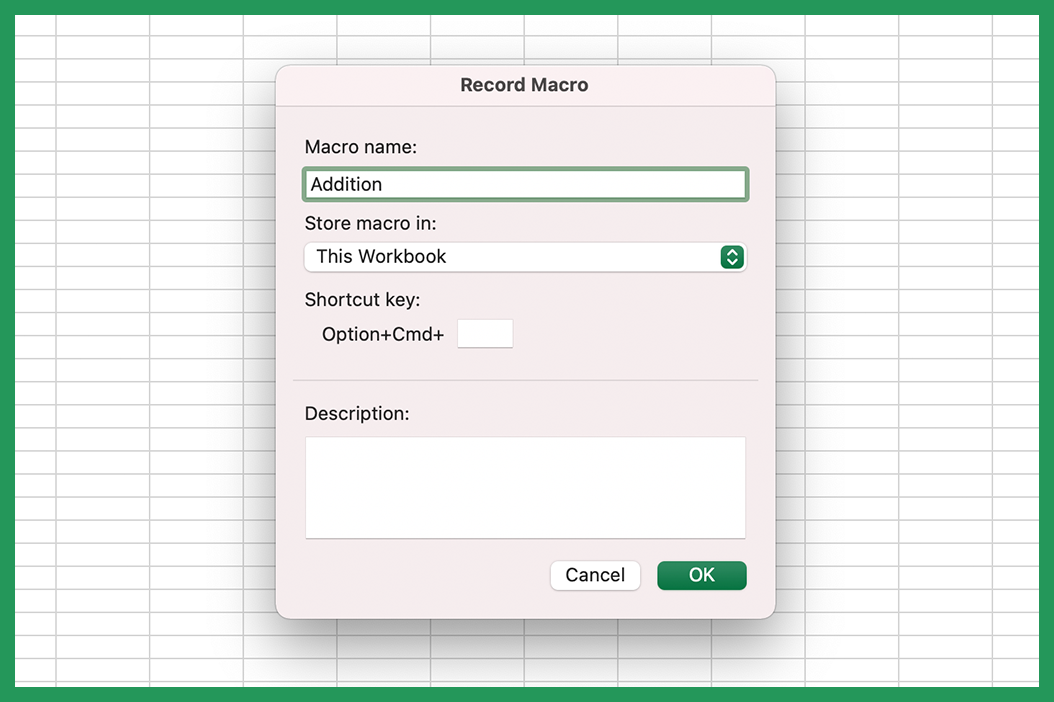
Press okay and you will begin recording, type your formula into a cell.
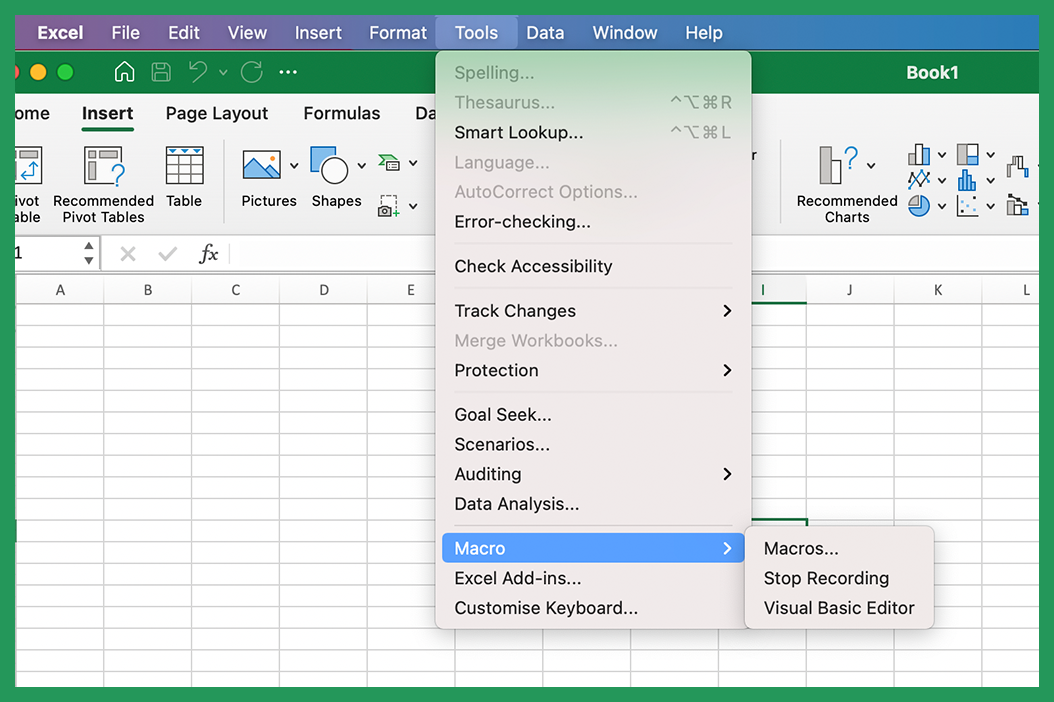
When you are finished click Tools > Macro > Stop Recording.
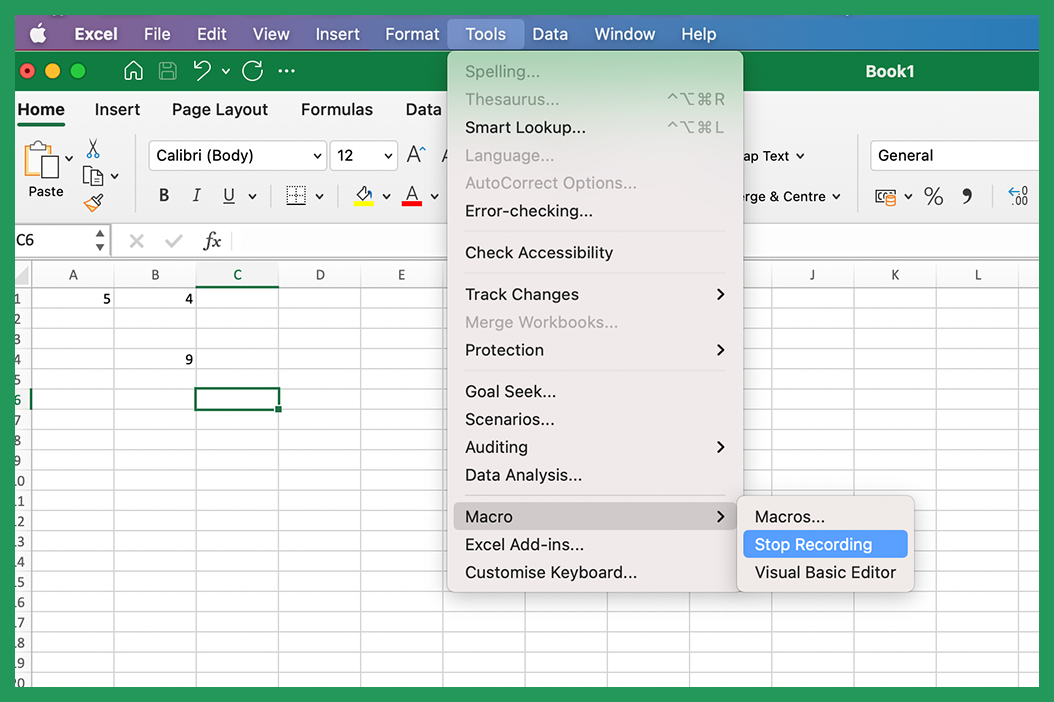
Next, delete the formula so we can test whether the macro alone can add the two cells together without us writing the formula. Then click Tools > Macro > Macros.
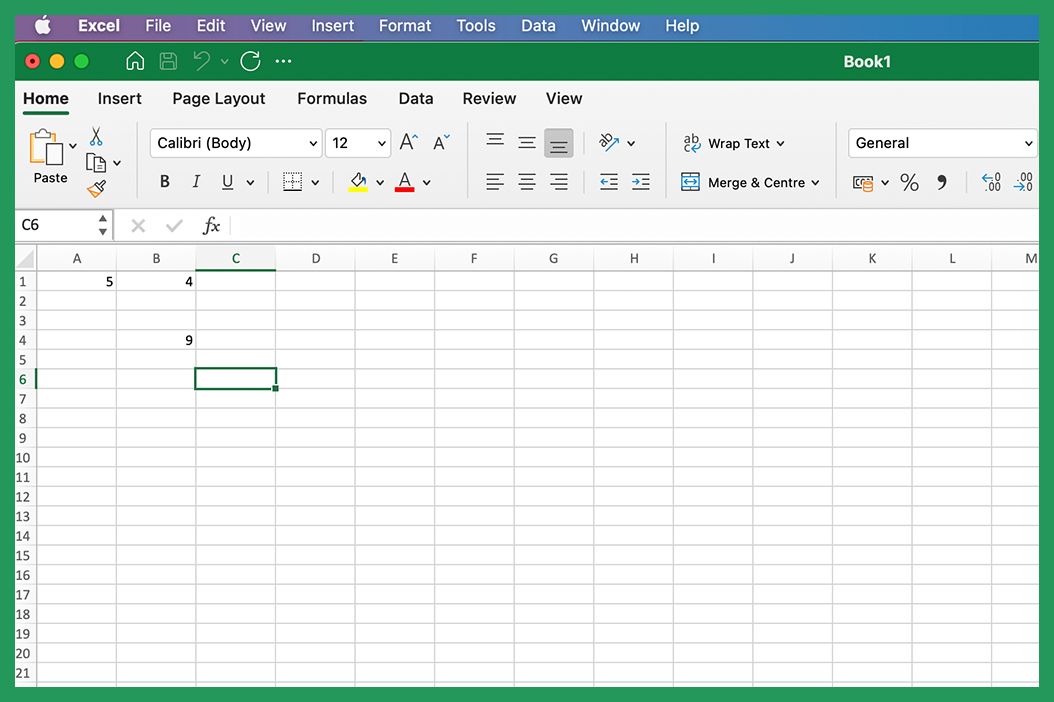
Select our addition macro from the list and hit run.
It should perform the calculation for you, and you should be left with a result of 9 in our example.
This is a simple example but macros can be used to automate far more complex tasks.
Macros are written in a programming language that is called Visual Basic for Applications (VBA). VBA is a powerful programming and scripting language that is built into Excel (and other Microsoft Office applications).
While VBA can be used to write extremely complex programs, it is also possible to write some simple macros in Excel, in Excel or code snippets that automate common tasks. One example of this would be writing an Excel macro that inserts your company logo into every spreadsheet that you create.
It is also possible to create an Excel macro that automatically formats cells containing dates in a particular way or turns every second row an alternate colour, which can be helpful for some forms of visual impairment as it allows people to more easily track which row the required information is in. The following step-by-step guide will help you grow your Excel skills, especially in the Macro department!
Create an Excel Macro in Seven Easy Steps
Assuming you have Microsoft Excel installed on your computer, making an Excel macro is a relatively easy process, just follow the below Excel macro tutorial and start to automate some of the more mundane tasks in your life. Let's create your first macro in Excel!
1. Open an Excel window and create a new workbook or open an existing one.
This will allow you to access the menus, to follow the instructions and to create the Macro. Depending on the actual version of Microsoft Excel you are using, you may have to enable the developer tab before you can proceed.
To do enable the Developer tab, you will need to click the File tab, go to Options > Customise Ribbon. Under Customise the Ribbon and under Main Tabs, select the Developer check box. After you choose to show the tab, the Developer tab will now remain visible, unless you clear the check box or happen reinstall a program in the Microsoft Office family.
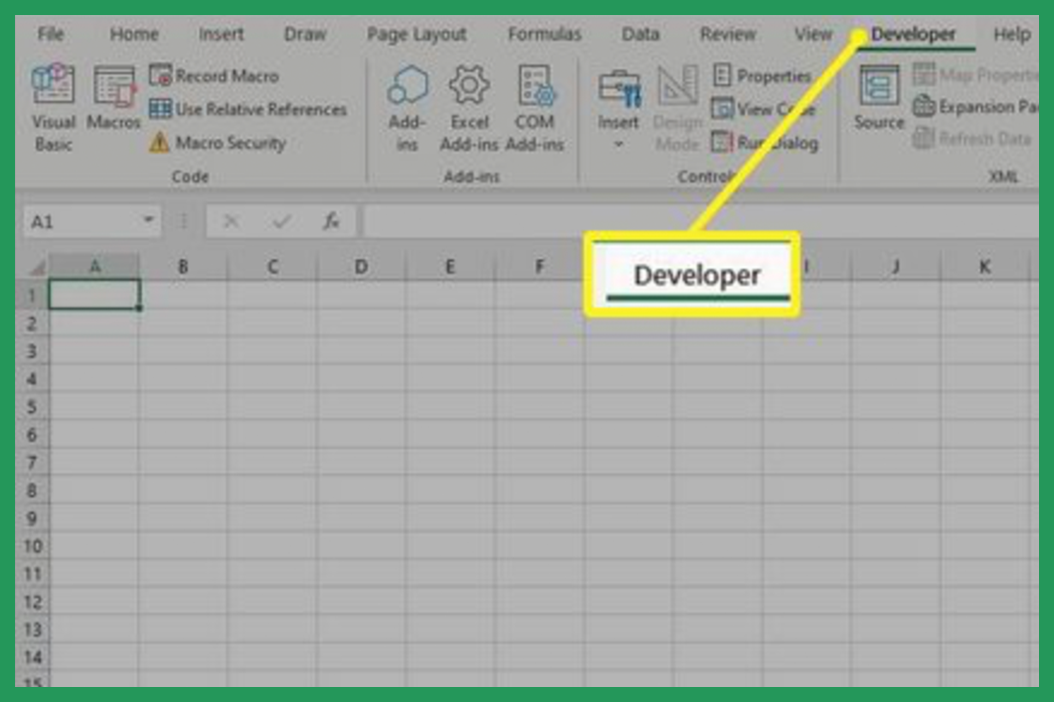
2. Click on the "Developer" tab and then click "Record Macro."
When you create a macro, you are using your computer to record your mouse clicks and keystrokes so whatever you do will be replicated in the Excel macro that you record. This may take some patience and a few attempts to get right but don’t be disheartened, the time that is saved by most macros makes the effort to record a macro worthwhile. Alternatively you can select Tools > Macro > Record New Macro.
3. Give your new Macro a descriptive name.
This will help you to keep track of all of the Macros in Excel that you create. Once you start using them, you will realise how useful and powerful they can be and you will probably begin to use them with increasing frequency.
You can also choose to assign a shortcut key for a particular Macro, if you wish so that it will trigger when you press the key or key combination that you have specified. Just be sure not to choose a combination that has already been assigned to another function in Office or on your computer more generally, like Alt + F4 together, which will close any active Excel window. You can select assign macro.
4. Click "OK" to start recording macros.
As soon as you double-click on the Macros button to start recording your macro, all of the actions of your mouse and keyboard will be logged until you tell it to stop recording. This may take a few attempts to get right and you may end up with a few unusable macros in Excel, but don’t we all! You can always go back and delete them later once you create a macro that does exactly what you want it to.
5. Perform the actions that you want to automate in Excel.
For example, if you want to automate entering data into cells, type the data into the cells. If you want to find and delete blank rows do a search for blank rows and delete them. All of the actions are replicated and it is important to take care to ensure that you are only doing things you want the Excel macro to do as well. As with all Microsoft Office programs, there is thankfully an Undo button in Excel in case the macro ends up having an unexpected result on your document.
It is also good for things like bulk formatting of data before it is exported for use in other programs. In such cases the other program will require a specific set of formatting and this can be quickly and easily achieved via Macros in Excel.
Macros are a very powerful tool and they can reduce the time that it takes to do a great many labour-intensive tasks.
6. Once you have finished recording the Macro, click on "Stop Recording" macro button in the Developer tab.
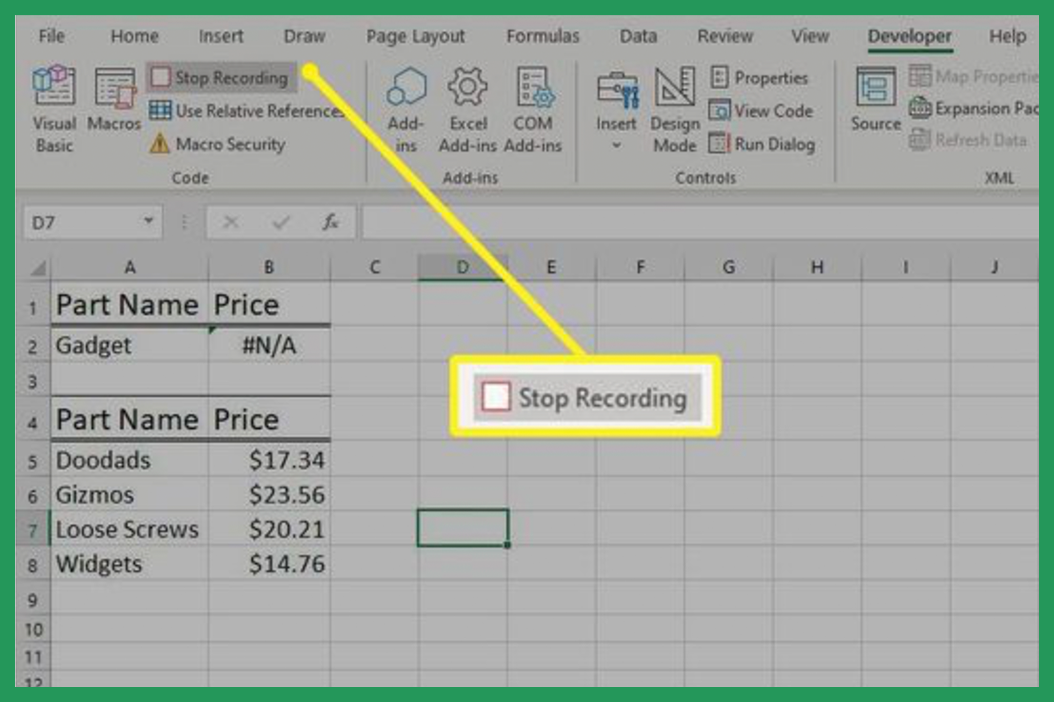
Clicking the Stop Recording macros button may seem a rather self explanatory step but it is easy to record what you would like the Excel macro to be and then to forget to press stop and continue on with what you were doing, leaving the macro recording away in the background. On Mac go to Tools > Macro > Stop Recording.
The end result of forgetting to Stop Recording is to render the recorded macro useless and have to start from the beginning again. This is obviously far from ideal so it is important to get it right the first time.
7. Save your current workbook so you can use the Excel Macro again later.
Now that you can record macro actions in Excel, you can automate all sorts of tasks to save yourself time and effort. This is a great tool to have the ability to use as the time saving functions can make a real difference and the automation of boring, mundane tasks can improve your working day and make you appear incredibly efficient and on the ball.
Being able to do things that look impressive and get work done in a short period of time can improve your reputation at work and even increase your chances of promotion.
What Is The Developer Tab?
The Developer tab is a toolbar that is inserted into the topmost row of the Microsoft Excel interface by default. The Developer tab provides access to functionality that is not available from the standard or main tabs that are displayed when you first open Excel. This extra functionality can be very useful for power users and those who are looking to automate tasks or create customised applications.
To insert the Developer tab:
1.Click the File tab, and then click Options.
2.In the Excel Options dialog box, click Customize Ribbon in the left pane to customize the ribbon.
3.In the right pane, select the Developer check box, and then click OK.
The Developer tab is now inserted into your Excel interface. This tab contains a number of tools that can be used to automate tasks, create custom applications and user forms, and to debug code.
Some of the more useful tools that are available from the Developer tab include:
- The Macro Recorder: This tool tells Excel to record your actions, so that they can be played back as macros. This is a great way to automate mundane tasks.
- The Visual Basic Editor: This is where you can create, edit, and debug Visual Basic for Applications (VBA) code. VBA is a programming language used in Excel to create a macro and in custom applications.
- The Form Controls: These are a set of tools that can be used to create custom user forms.
- The ActiveX Controls: These are a set of tools that can be used to create custom applications.
The Developer tab doesn't just have to be for developers! So, don't be put off enabling it.
How to Use the Excel Macro Recorder
The Macro Recorder is a fantastic way to automate repetitive tasks in Excel. It allows you to record your actions so that they can be played back as a macro in Excel. This would save you a lot of time and effort, and it is a good way to figure out how to use macros in Excel.
See the following Excel macro tutorial:
1. Click the Developer tab, and then click the Record Macro button.
2. In the Macro name box, type a name for the macros.
3. In the Shortcut key box, type a keyboard shortcut that you want to use to run macros.
4. In the Store macro in list, click Personal Macro Workbook if you want the macros to be available every time that you start Excel.
5. Click OK to start the recording of the macro in Excel.
6. Perform the actions that you want to record.
7. Click Stop Recording on the Developer tab when you have finished recording the macro in Excel.
The macro is now stored in your Personal Macro Workbook and is available to be run via the Developer tab whenever you start Excel.
What Is A Macro Enabled Workbook?
A macro enabled workbook is a Microsoft Excel file that contains macros. Macros are pieces of code that can be used to automate tasks or to create custom applications. Macro enabled workbooks have the file extension ".xlsm".
Macro enabled workbooks are different from other Excel files because they can contain code. This code can be written in Visual Basic for Applications (VBA Application), and it can be used to automate tasks or to create custom applications.
Macro enabled workbooks are useful for a number of reasons. Firstly, they can be used to automate repetitive tasks. This can save you a lot of time and effort, and it can make you appear more efficient and on the ball at work. Secondly, Excel macro enabled workbooks can be used to create custom applications. This can be very useful if you need to create a bespoke application for your business, in a particular workbook.
How to Create A Macro Enabled Workbook
Creating an Excel macro enabled workbook is very simple. All you need to do is save your Microsoft Excel file as a macro enabled workbook. This can be done by clicking the "Save As" button on the "File" tab, and then selecting ".xlsm" from the "Save as type" drop-down list.
Once you have saved your file as an Excel macro enabled workbook, you will be able to insert macros into it. These macros can be written in Visual Basic for Applications (VBA), and they can be used to automate tasks or to create custom applications.
Tips for Creating Macros in Excel
Here are some tips for creating macros in Excel:
- Use the Macro Recorder to record macro actions. This is a great way to automate repetitive tasks.
- Write your macro in Visual Basic for Applications (VBA). VBA is the programming language that is used to create macros in Excel.
- Test your macros thoroughly before using them. This will help to ensure that they work as intended and that they do not cause any problems.
- Use comments to explain what your macros do. This can be helpful if you or someone else needs to make changes to any of the macros in the future.
Tips To Customize Your Excel Macros
Once you have recorded your Excel macro, you can make a few changes to customize the ribbon and record macro to better suit your needs. Here are a few tips when creating your first macro:
- Use the Visual Basic Editor to view code and make changes to it in Excel.
- Use relative references rather than absolute references. Relative references will make your program macros more flexible and easier to use.
- Assign a keyboard shortcut to your macro. This will make it easier to run macros when you need to. You can do this with the help of a shortcut key combination.
- Save your macro in your Personal Macro Workbook. This will make the corresponding macro available every time you start Excel.
With these tips, you can make sure that your macros in Excel are exactly what you need them to be. By customizing your Excel macros to suit your specific needs, you can make them more effective and easier to use.
Shortcut Key to Record Macro
Yes, there is a shortcut key for Excel macros. The shortcut key is "Alt+F8". To use this shortcut in Excel, simply press and hold down the "Alt" key on your keyboard, and then press the "F8" key. This will then bring up the Macro dialog box, where you can select the macro that you want to run.
You can also use this shortcut key to record macros in Excel. To do this, simply press and hold down the "Alt" key on your keyboard, and then press the "F8" key. This shortcut will bring up the Macro dialog box. From the Macro dialog box, you can click the "Record Macro" button to start recording your macro in Excel.
Conclusion
So there you have it. You now know how to record macros in Excel using VBA code. You also know how to make a macro enabled workbook, and you know how to customize your macros to better suit your needs. With these Excel skills, you can make sure that your macros in Excel are exactly what you need them to be. We hope this data saves you a huge amount of time in the future. Thanks for reading!


